Introduction
The Quantum GBP index indicator Ninjatrader 8, is the latest addition to our suite of currency indices, and one which we have been asked for many times, and even more so since Brexit. It is an index which has taken us some time to develop, and through a series of complex calculations draws its primary data from a basket of currencies based on the old-style dollar index, the Dixie. This is converted to a chart for the British pound. The result is an accurate index which describes strength and weakness for the GBP currency in all timeframes.
The underlying basket and weighting are as follows, with the SEK replaced with the AUD. The percentages are as follows:
- EUR 57.6%
- JPY 13.6%
- GBP 11.9%
- CAD 9.1%
- AUD 4.2%
- CHF 3.6%
The calculated value of the US Dollar is multiplied by the live exchange rate for the GBP/USD currency pair.
The indicator can be used in one of three ways:
- First, to identify and confirm strength and weakness in major and cross-currency GBP pairs, helping you get in, stay in and get out
- Second, as a confirming indicator for the Quantum Currency Strength indicator, providing a perspective against other currencies
- Finally, to provide a relevant and consolidated view of the British pound
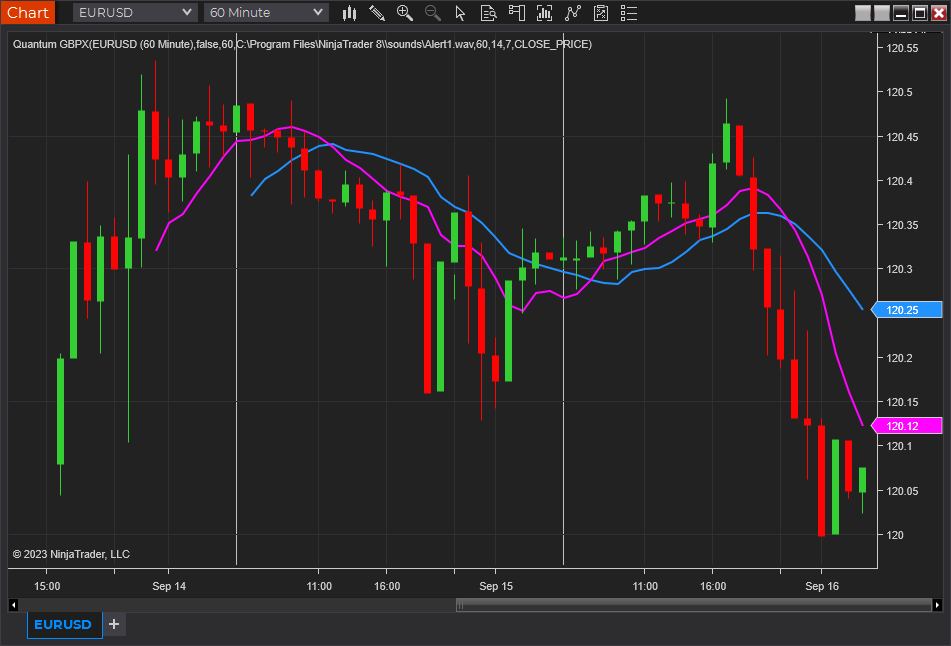
The indicator plots strength and weakness of the UK pound as a candlestick chart in a separate indicator window when you attach it to the chart. In addition, there are two configurable simple moving averages to make chart reading easier.
Installation
Open your NinjaTrader 8 platform and select a chart.
Right click the chart to bring up a menu which looks like the following image:
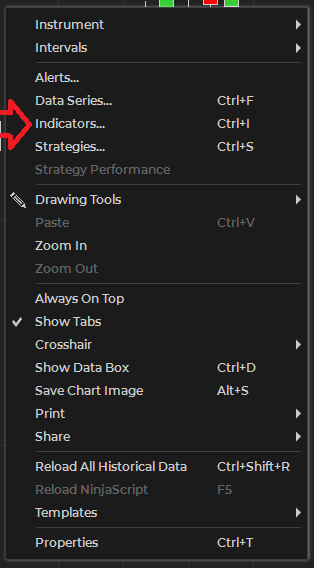
Select Indicators… which will open the following window. Alternatively, you can open this window by clicking the Indicators button in the chart toolbar or by pressing Ctrl + I while focused on the chart.
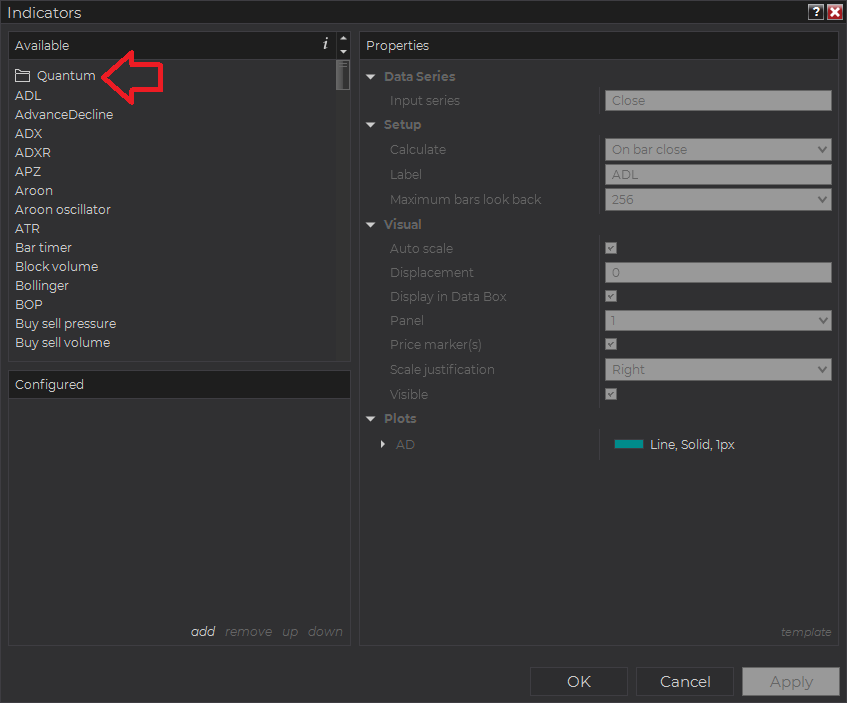
In the Indicators window under Available section, go to Quantum > Quantum GBPX and click it to select the indicator. Once selected, click “add” under the Configured section which will put it on the list of active indicators to be added in the chart.
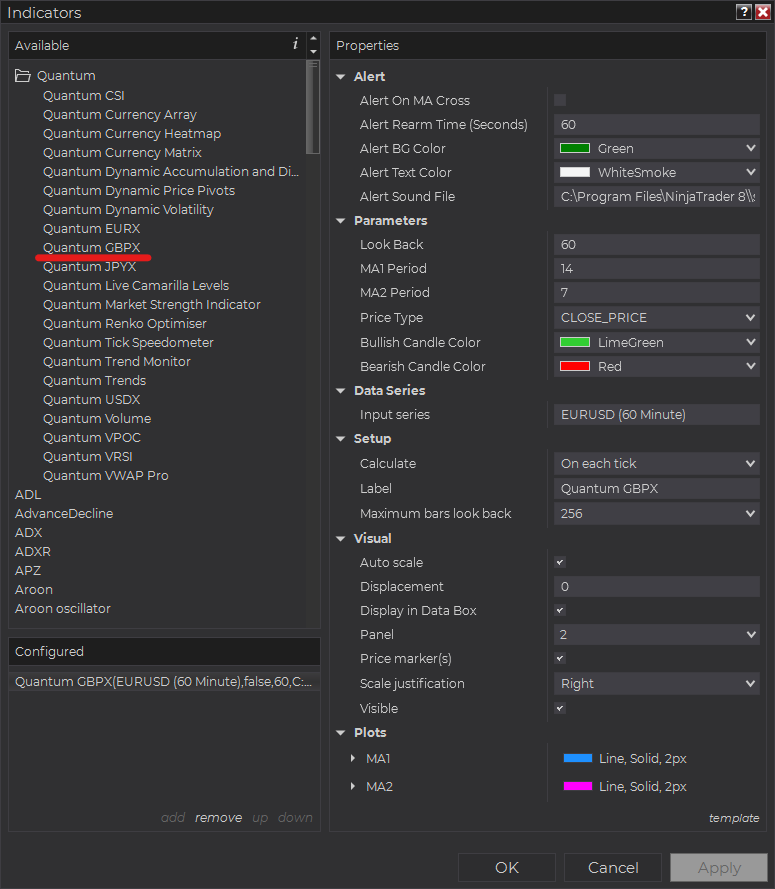
Before clicking the OK or Apply button to complete, the indicator has several configurable options. You can click the Apply button at any time, and this will apply any changes you have made to the indicator without closing the window. This will allow you to see the changes you have made to the indicator, without closing with the OK button or the Cancel button.
Configuration
All user input can be configured at the right-hand side of the Indicators window under the Properties section. These are the default settings when you add the indicator in a chart.
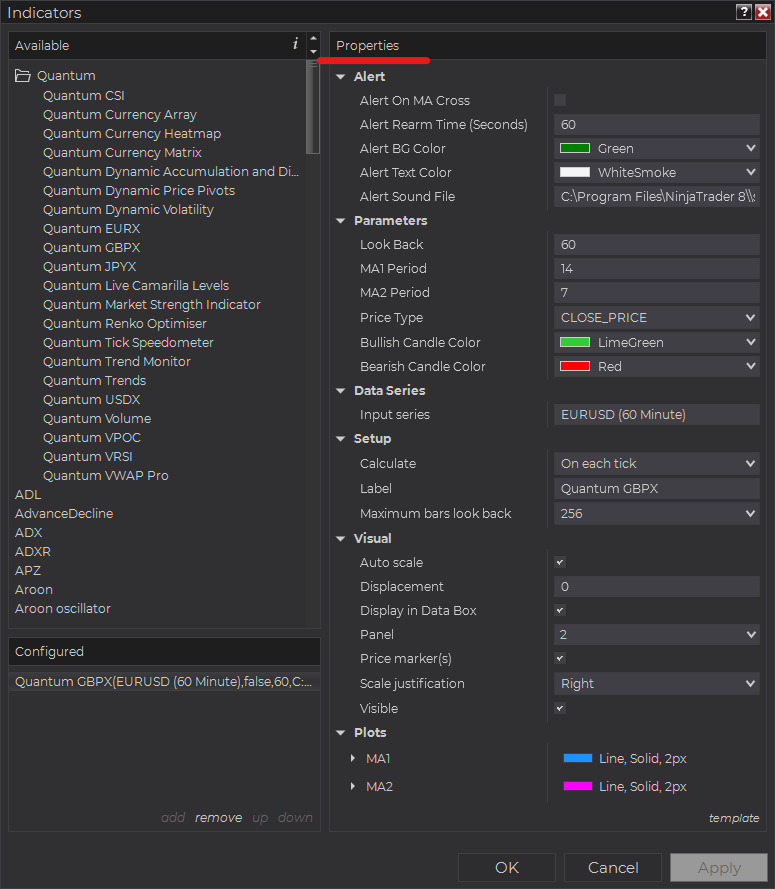
Main Settings
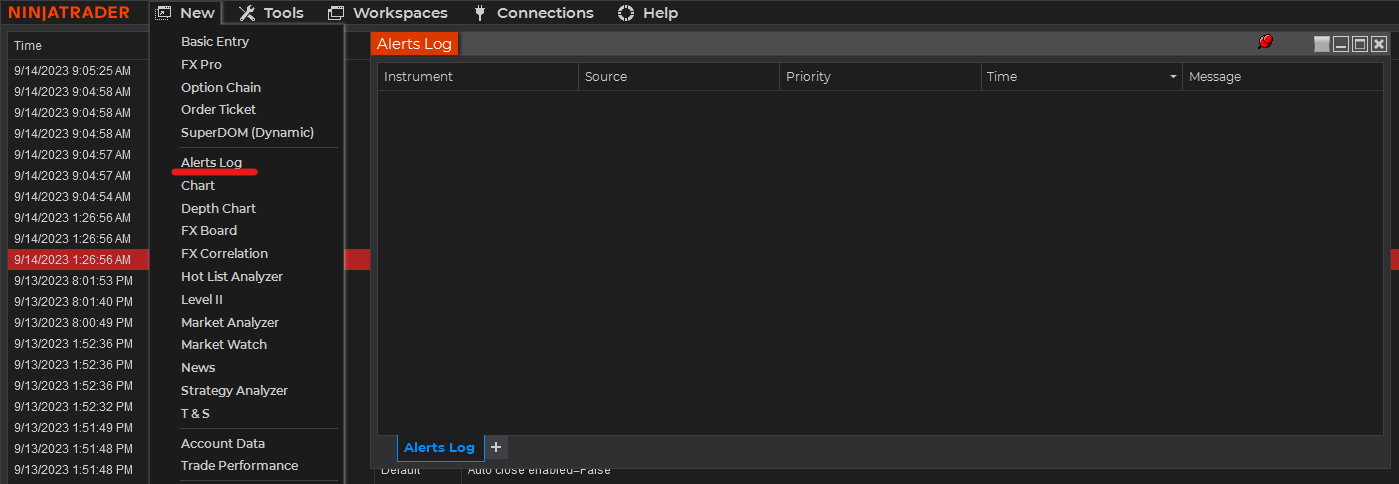
Alert
The following settings affect the indicator’s alert notifications displayed in the Alerts Log. You can open the Alerts Log from your NinjaTrader 8 client’s menu bar in the main window at New > Alerts Log.
Alert On MA Cross
When enabled, the indicator sends an alert notification in the Alerts Log when the indicator’s 2 moving averages cross paths which can indicate a change in trend in the GBPX.
Alert Rearm Time (Seconds)
This adds a delay to the next alert notification, expressed in number of seconds.
Alert BG Color
This setting allows you to customize the background color of the indicator’s messages as they appear in the Alerts Log.
Alert Text Color
This setting allows you to customize the color of the text as the indicator’s messages appear in the Alerts Log.
Alert Sound File
You can change here the sound file the platform uses when this indicator triggers an alert. By default, it uses the Alert1.wav file packaged with your NinjaTrader installation. Please make sure that the file is supported and the absolute path to the sound file is entered correctly.
Parameters
Look Back
Sets the number of bars that the indicator displays on the chart. Please note that a larger Look Back consumes more of your machine’s resources.
MA1 Period
Sets the look back period of 1st of the 2 moving averages calculated across the GBPX. Useful for setting up MA crosses.
MA2 Period
Sets the look back period of 2nd of the 2 moving averages calculated across the GBPX. Useful for setting up MA crosses.
Price Type
Sets the price type of the indicator’s the 2 moving averages. You can either choose OPEN_PRICE, HIGH_PRICE, LOW_PRICE, or CLOSE_PRICE of the GBPX to calculate both moving averages. The default price type is based on the GBPX’s close prices.
Bullish Candle Color
Sets the color of the bullish candlestick bars in the GBPX.
Bearish Candle Color
Sets the color of the bearish candlestick bars in the GBPX.
Other Settings
Data Series
Input Series
Opens the indicator Input Series dialogue which allows you to select the source of data for your indicator’s calculations.
Setup
Calculate
Sets the frequency at which the indicator performs its calculations.
Label
The label of the indicator’s instance displayed on the chart.
Maximum bars look back
Determines the maximum number of bars the indicator can look back to perform calculations on historical data. This is set to 256 by default (the most memory-friendly setting), but it can be changed to “infinite” to allow for a greater look back period.
Visual
Auto scale
When enabled, the indicator will be included in the chart panel’s vertical automatic scaling.
Displacement
Sets the number of bars by which to displace the indicator plots.
Display in Data Box
Enables or disables the inclusion of the indicator’s plot values in the Data Box
Panel
Sets the panel in which the indicator is plotted. If you select “Same as input series,” the indicator will be linked to the Input Series and automatically move if the Input Series is modified to a different panel.
Price marker(s)
When enabled, the indicator value is plotted in the axis selected under the “Scale Justification” property.
Scale justification
Sets the scale on which the indicator will be plotted. Possible values are “Right,” “Left,” and “Overlay”.
Visible
Enables or disables visibility and function of the indicator on the chart.
Plots
Sets a variety of parameters, such as color, for the plots drawn by the indicator.
- MA1
- MA2
Unloading the indicator
Here are the steps to remove the indicator in the chart.
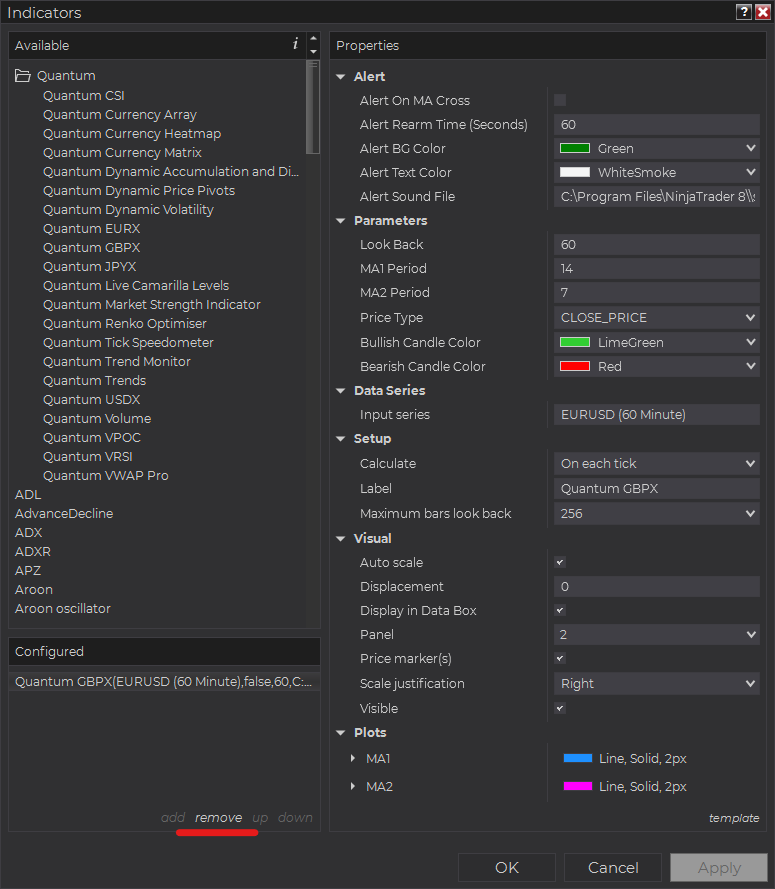
Right-click on the chart then select Indicators… from the menu. Select Quantum GBPX from the Configured section and click “remove” then OK to confirm and the indicator should be unloaded from your chart.